Alarm Rules
Navigate to the Configuration module menu on the C•CURE IQ home page, located in the left navigation pane, to access the Rules.
Creating a Rule
To create a Rule for C•CURE IQ, complete the following steps.
- Before creating a Rule, make sure you have the Privilege access. See Privilege Permissions for Rules for more information.
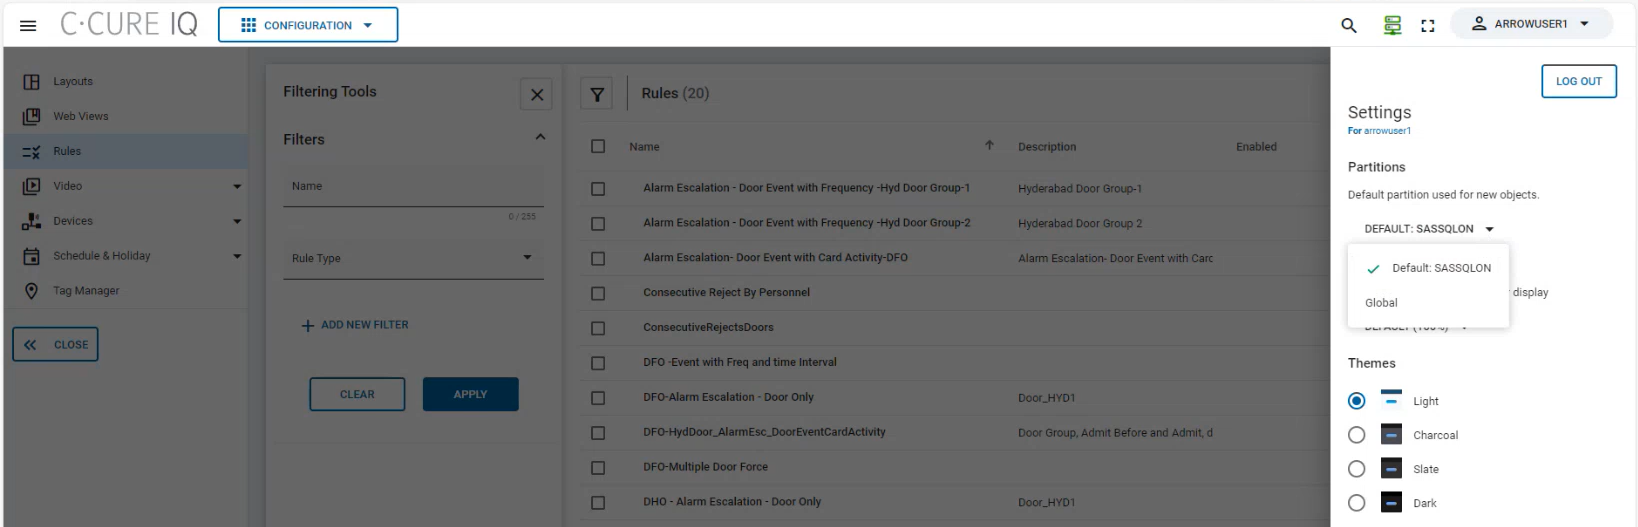
- To create Rules in an Enterprise environment, user must select any Partition other than
Global Partition under user settings. Refer figure below.
- System will not allow to create Rules in MAS environment.
- If Default license is 1, then user can create only 1 Rule, and if Default license is 2, then user can create multiple Rules.
- Click Add New from the top right of the Rules window.
Create Rule window displays.
Figure 1. Creating Rule 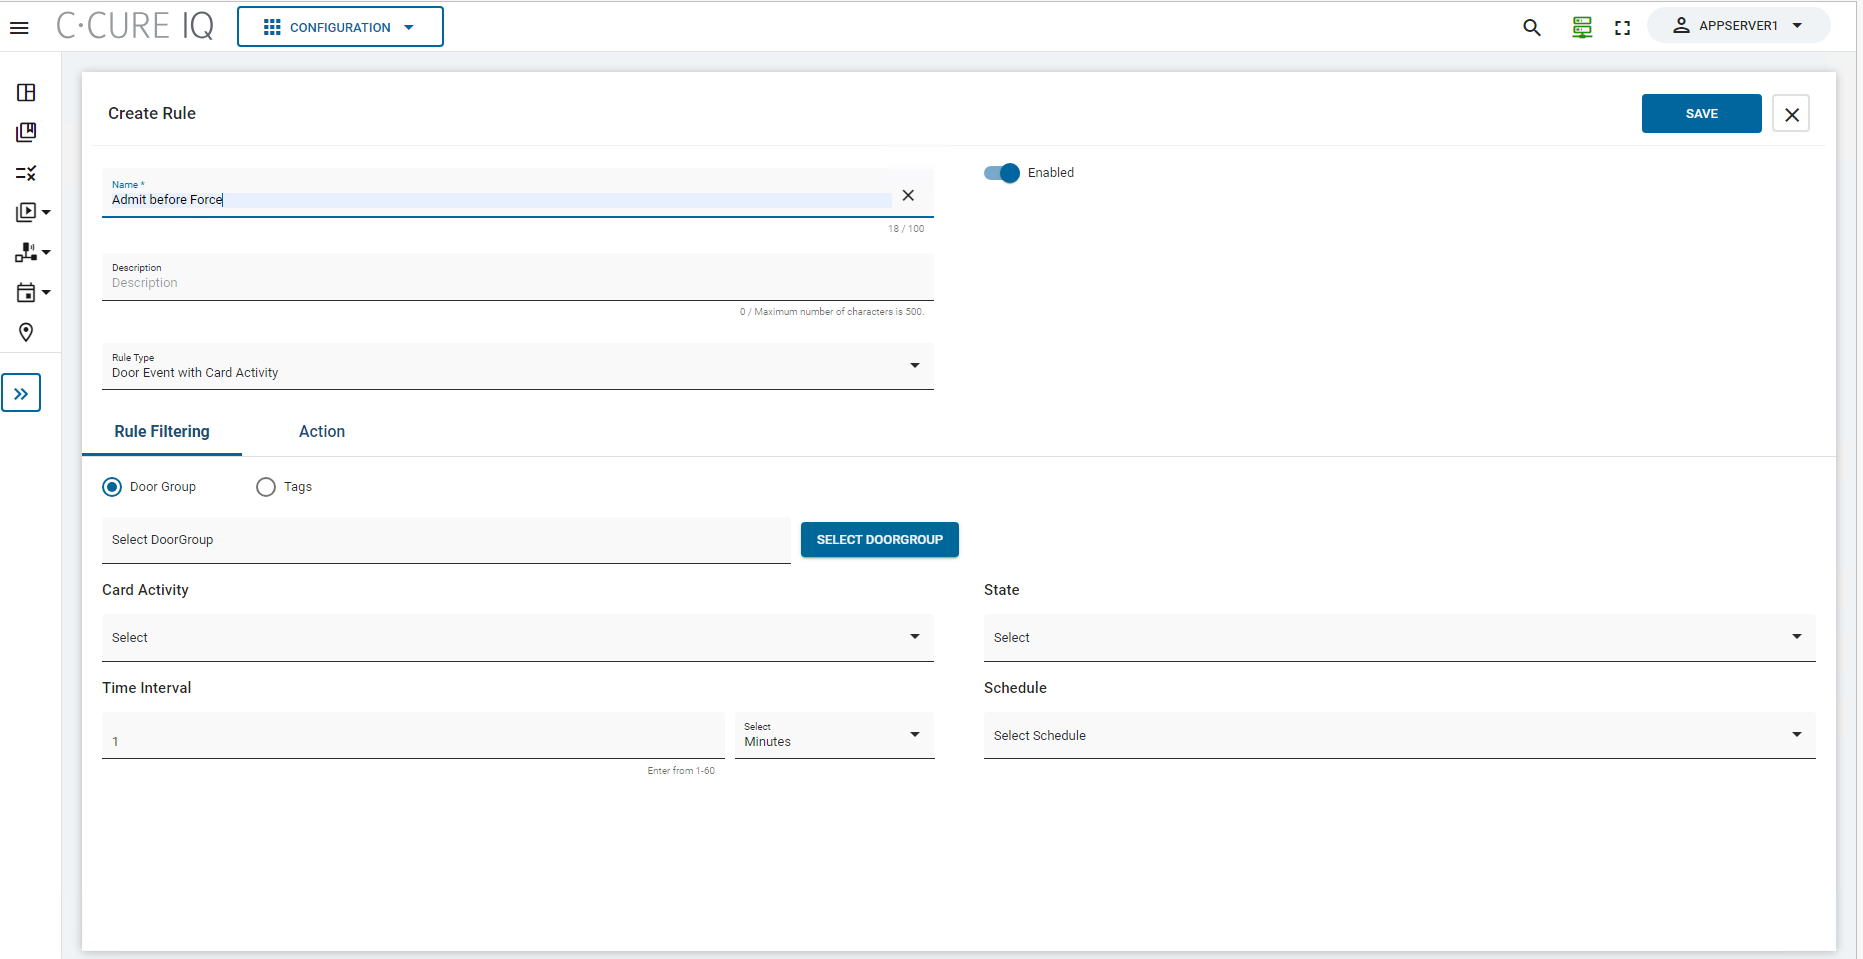
- Enter a name in the Name field.
- Select the Enabled option.
- Enter a description in the
Description field.
Note: Maximum number of characters allowed are 500.
- User can create Rules under the following three categories. Click the drop-down
to select the Rule Type.
- Alarm Reduction
- Door Event with Card Activity
- Door Event with Frequency and Time intervalNote: This option operates according to the count of doors within that group.
- Door Event with Schedule
- Alarm Escalation
- Door Event with Card Activity
- Door Event with Frequency and Time intervalNote: This option operates according to the count of doors within that group.
- Door Event with Schedule
- Lone Worker
- Credential Usage
- Consecutive Rejects by Personnel
- Consecutive Rejects on Door
- Alarm Reduction
- Rules can be applied on following types:
- Door only
- Door Group
- Door/Door Group associated with Meta Tags
- Personnel only
- Refer the table below to understand the details of the options Rule
Filtering and Action while creating a Rule.
Table 1. Rule Filtering and Action - Fields and Description Fields Description SELECT DOORGROUP Click this button to filter the Door Group by Name or Description. Card Activity Select the following Card Activity from the drop-down. - Admit Before
- Admit After
- Admit Before and After
Note: The Card Activity field will be disabled, as it is focusing only on Rejects during its operation (for Alarm Type: Credential Usage).Time Interval Enter the time within the Time Interval field. For Minutes, you can specify a time interval between 1 to 60, for Hours, the range is from 1 to 24, and for Seconds, the range is from 1 to 59. Note: The default time interval selection is five seconds.State Select the State from the drop-down as either Doors Held or Doors Forced. Number of Doors having State Occurrences Provide the count of doors in this field. You can input numbers ranging from 1 to 10. Note: Default Time Interval and Addition of Door held under Door Event with Schedule.Note: The Rules trigger only when exactly N unique Doors within the Door Group are forced, with the specified conditions of X state occurrences and a time interval of Y.The maximum allowed occurrences are 10, meaning up to 10 unique Doors within the Door Group can be forced, and they must align with the specified number of state occurrences.
For instance:- Rule will not trigger if one unique Door is forced multiple times while another is forced once.
- If five unique Doors within the Door Group are forced, with the state occurrences provided as 10, and a time interval of 1, then the Rule will not trigger.
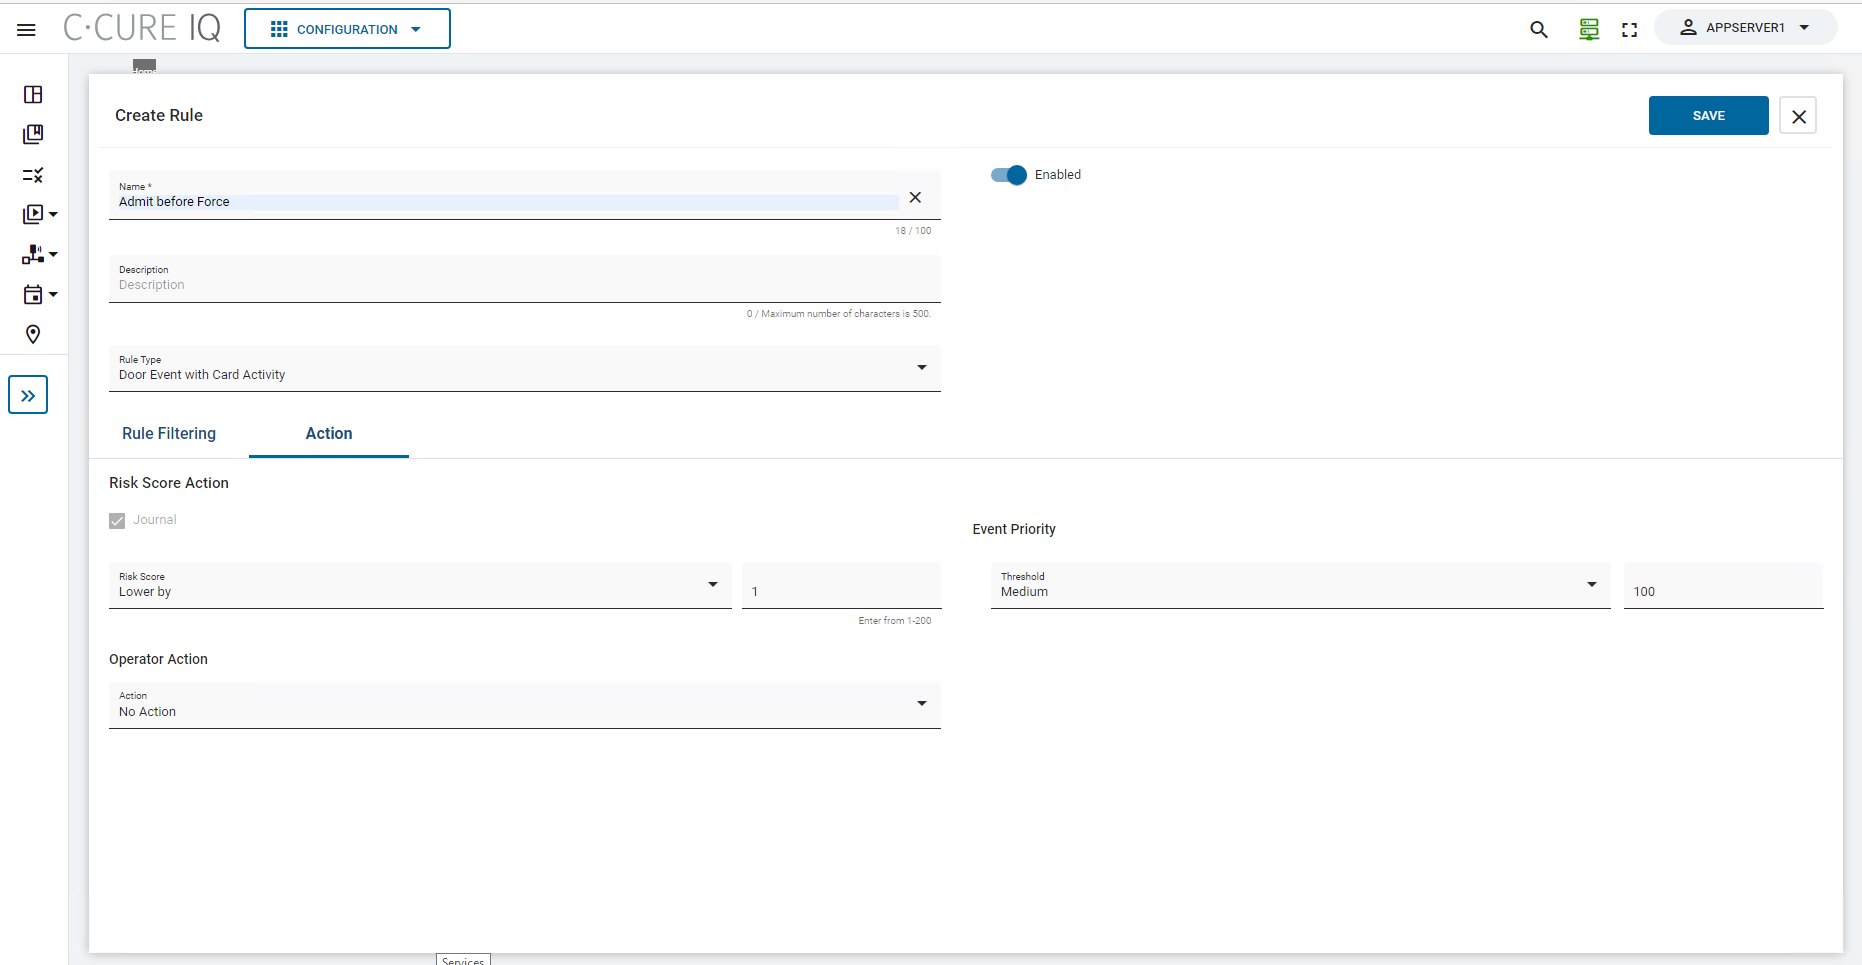
Note: This field will disable, and you will set its default value to 1 for Rule type: Door Event with Schedule.Card Activity Occurrence Provide the count of card swipe/activity in this field. You can input numbers ranging from 1 to 10. Schedule Select the pre-configured Schedule from the drop-down. SELECT DOOR Click this button to filter the door by Name or Description. SELECT TAGS Click this button to filter the tags by Name or Description. Risk Score Select the default for the Risk Score field to Lower by for alarm type: Alarm Reduction, and Raise by for alarm type: Alarm Escalation. Input values ranging from 1 to 200.
Note:- When Rule gets activated, event priority will reduce or escalate the score of the associated event by the set number (for the Alarm type: Alarm Reduction).
- Ensure that the Risk Score value remains within the range of 1 to 200 (If the value reduces below 1, it will default to 1 and if the value exceeds 200, it will default to 200).
Operator Action Choose from the available Actions in this field. - Acknowledge: Acknowledges the event
- Acknowledge and Clear: Acknowledges and clears the event
- No Action: Action is not performed
Note: Even in the absence of a preset acknowledgment in the event, if the user configures such acknowledgment within the Rules, the Rules will override the configurations set in the Acknowledgment tab of Event.Event Priority Select a Threshold from the options available in this field. - Critical (200)
- Very High (175)
- High (150)
- Medium High (125)
- Medium (100)
- Medium Low (75)
- Low (50)
- Very Low (25)
If the Event Priority Threshold is set to 200 and if any event fired which is related to the Door is equal to or greater than 200, then the Risk Score will not be modified.
Similarly, if Event Priority is set to 25 and if any event fired which is related to the Door is equal to or greater than 25, then the Risk Score will not be modified.
SELECT EVENT TO PULSE Click this button to filter the events by Name or Description. Disable Person Choose between the Yes or No options under this field. Note:- Check box Journal is disabled in Risk Score Action field for Alarm types: Alarm Reduction and Alarm Escalation.
- The Lone Worker will exit either by executing the Admit function at the outbound reader or through interaction with any other reader within the premises.
- Default value for Lone worker is 1. If there is more than one person admitted for the door, the Lone Worker action will not be taken into consideration.
- Lone Worker will be active on set schedule.
- By default Lone Worker poll interval will be 1 minute.
- If the Risk Score raised more than 200 or less than 25, then Rules will not be triggered.
- Click Save to save and close the configuration.